How To Install LAMP Stack on Ubuntu

When it comes to web development, one of the most popular solutions to host dynamic websites and web applications is the LAMP stack. LAMP stands for Linux, Apache, MySQL, and PHP, which together form a powerful toolbox of open-source software.
If you’re looking to create a server environment for your website, this is a solid choice. The best part? It’s free and scalable!
In this guide, I’ll walk you through every step of setting up a LAMP stack on Ubuntu, ensuring you have everything ready for your web projects. Let’s dive in!
What is a LAMP Stack?
A LAMP stack is an open-source software bundle used to create dynamic websites and web applications. Here’s a breakdown:
- Linux: The operating system at the core of the stack. In this guide, we’ll use Ubuntu.
- Apache: The web server software that handles HTTP requests and serves web pages.
- MySQL: The database management system where your website’s data (such as user information, posts, etc.) is stored.
- PHP: The server-side scripting language used to generate dynamic content.
Together, they provide a reliable and powerful environment for hosting your web projects.
Prerequisites
Before we start, make sure you have:
- A system running Ubuntu with Sudo privileges
- A terminal or SSH access to the server.
- An internet connection.
If you’re all set, let’s get started!
Step 1: Update and Upgrade Your System
First, open your terminal (use Ctrl + Alt + T) and ensure your system is up-to-date. Updating and upgrading your package lists prevents conflicts during installation:
sudo apt update && sudo apt upgrade -yThis command updates the package index and upgrades installed packages. The -y flag confirms the upgrades automatically.
Step 2: Install Apache
Apache is one of the most popular web servers in the world. Installing it on Ubuntu is easy:
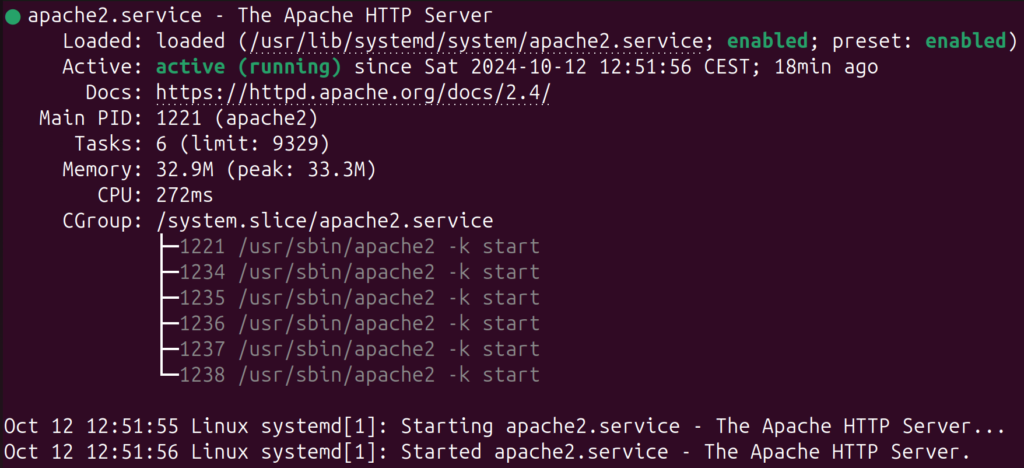
sudo apt install apache2 -yAfter the installation, Apache should start automatically. You can check if it’s running by typing:
sudo systemctl status apache2You should see a status indicating that Apache is active and running.

Testing Apache
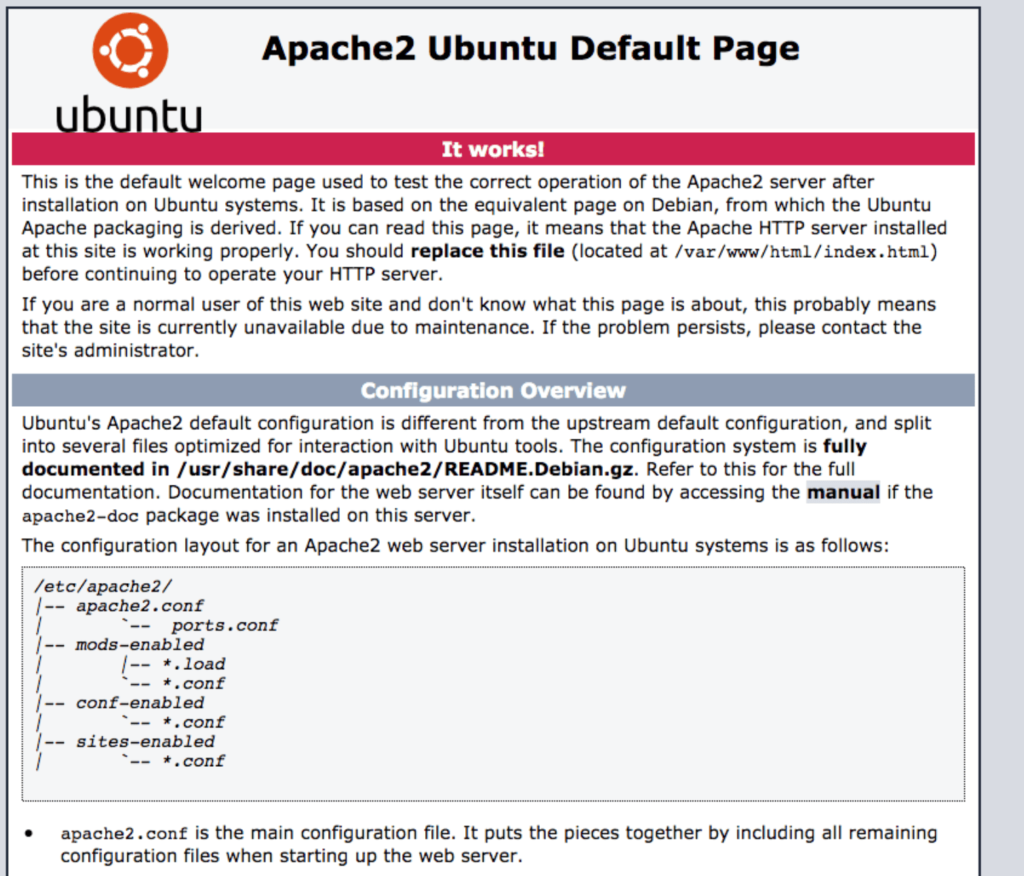
To verify that Apache is serving web pages, open your web browser and visit:
http://localhostIf everything is working correctly, you’ll see the Apache2 Ubuntu Default Page.

Congrats, you’ve installed Apache!
If you would like to configure your Apache setup further, check out our guide on How to Set Up Apache Virtual Hosts on Ubuntu.
Step 3: Install MySQL
Next, we need to install MySQL, the database management system that stores your site’s data. In your terminal, run:
sudo apt install mysql-server -yOnce MySQL is installed, it’s important to run a security script that helps secure your MySQL installation:
sudo mysql_secure_installationThis will guide you through a series of security settings, such as setting the root password and removing unnecessary features. Follow the prompts to enhance your database’s security.
For a secure installation, answer yes to most of the prompts.
- Remove anonymous users: Type Y to remove anonymous users.
- Disallow root login remotely: Type Y to prevent root logins from remote machines.
- Remove test database and access to it: Type Y to remove the test database.
- Reload privilege tables now: Type Y to reload privilege tables and apply the changes.
Testing MySQL
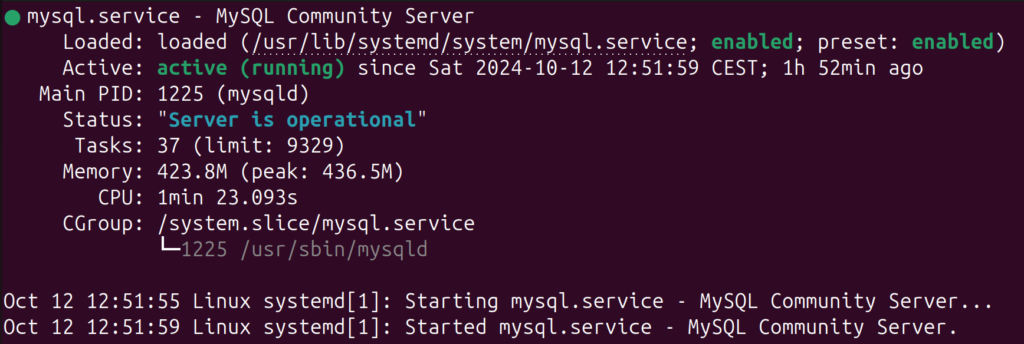
To ensure MySQL is running properly, type:
sudo systemctl status mysqlYou should see a message indicating that MySQL is active and running.

Step 4: Install PHP
Now, let’s install PHP, the language that allows your server to process dynamic web content:
sudo apt install php libapache2-mod-php php-mysql -yThis command installs PHP and some necessary modules that integrate it with Apache and MySQL.
Testing PHP
To check the PHP version installed, run:
php -vYou should see the PHP version information, confirming that PHP is installed successfully.

Step 5: Test the LAMP Stack
To make sure everything works together, create a test PHP file in Apache’s root directory. Open your terminal and type:
sudo nano /var/www/html/info.phpAdd the following line of PHP code:
<?php phpinfo(); ?>Save the file (Ctrl + O, then Enter) and exit (Ctrl + X).
Now, open your web browser and go to:
http://localhost/info.phpIf everything is set up correctly, you should see a page displaying detailed information about your PHP setup. This confirms that Apache, MySQL, and PHP are all working together!
Tip: Remember to delete this file afterward (
sudo rm /var/www/html/info.php) to prevent exposing sensitive configuration information.
Step 6: Configure Apache to Use PHP Properly (Optional)
By default, Apache serves files with an .html extension before .php. If you want to prioritize PHP files, you’ll need to update the configuration. Open the Apache directory index file:
sudo nano /etc/apache2/mods-enabled/dir.confModify the line that starts with DirectoryIndex to:
DirectoryIndex index.php index.html index.cgi index.pl index.xhtml index.htmThis tells Apache to prioritize index.php files. Save and exit, then restart Apache:
sudo systemctl restart apache2Step 7: Install Additional PHP Modules (Optional)
Depending on your project requirements, you may need additional PHP modules like php-curl, php-gd, or php-xml. To install multiple PHP modules, use:
sudo apt install php-curl php-gd php-xml -yYou can see all the installed modules using:
php -mThis command lists the PHP modules currently enabled.
Conclusion: Your LAMP Stack is Ready!
Congratulations! You have successfully set up a LAMP stack on Ubuntu. You now have a complete environment to develop and host your web applications. Whether you’re building a WordPress site, developing custom web apps, or experimenting with PHP, your LAMP stack is up and running.
If you want to learn more about how you can set up and configure your lamp stack, check out our guide on How to Set Up Homelab to Practice Penetration Testing. Here we will explore deeper how you can create a basic website where you can input an email address, process it with PHP and store it in a MySQL database. Happy coding!


