How to Install PHP on Ubuntu Linux
PHP (Hypertext Preprocessor) is a popular server-side scripting language widely used for web development. Installing PHP on Ubuntu is a straightforward process, and this guide will walk you through each step, ensuring you have a working PHP setup on your system. Whether you’re setting up a local development environment or preparing a server for a web application, this tutorial has you covered.
What is PHP?
PHP (Hypertext Preprocessor) is a widely-used, open-source server-side scripting language designed for web development. Created by Rasmus Lerdorf in 1994, it is embedded within HTML and runs on the server to generate dynamic web content.
PHP powers popular platforms like WordPress and integrates seamlessly with databases such as MySQL, making it essential for building login systems, forms, and e-commerce sites. PHP is a versatile and essential tool for modern web development.
Step 1: Update Your System
Before installing PHP, it’s always a good practice to update your system packages to the latest versions. Open the terminal and run the following commands:
sudo apt update
sudo apt upgrade -y
The apt update command fetches the latest information about available packages, and apt upgrade installs the updates. The -y flag automatically confirms the updates.
Step 2: Install PHP
Ubuntu comes with a package manager called apt, which you can use to install PHP and its dependencies.
Run the following command:
sudo apt install php libapache2-mod-php
This command installs the latest version of PHP available in the default Ubuntu repositories. The module libapache2-mod-php is also needed as it allows Apache to interpret and run PHP code on your server. You can check the installed version by typing:
php -v
You should see output similar to:

This confirms that PHP is installed and ready to use.
Step 3: Install PHP Extensions
PHP has many extensions that enhance its functionality. You may need these extensions depending on the project you’re working on. For instance, if you’re setting up a LAMP stack or working with a CMS like WordPress, you’ll likely need some additional extensions.
The command to install PHP extensions follows this pattern:
sudo apt install php-<extension_name>
Some commonly used PHP extensions include:
- php-mysql: For MySQL database integration.
- php-xml: For XML parsing.
- php-curl: For making HTTP requests.
- php-gd: For image processing.
For example, to install php-mysql and php-xml, run:
sudo apt install php-mysql php-xml -y
You can check if the extension is loaded by creating a phpinfo() file or using php -m to see a list of installed modules:
php -mStep 4: Testing PHP Installation
To confirm that PHP is working correctly, you can create a simple PHP file in your web server’s root directory. Assuming you are using Apache (which is the default web server on Ubuntu), the root directory is usually /var/www/html. If you haven’t set up Apache yet, you can follow our guide on How To Set Up Apache Web Server on Ubuntu.
Create a test file called in the /var/www/html directory called info.php:
sudo nano /var/www/html/info.php
Add the following line to the file:
<?php phpinfo(); ?>Save the file (Ctrl + O, then Enter), and exit (Ctrl + X).
Now, open your web browser and navigate to:
http://localhost/info.php
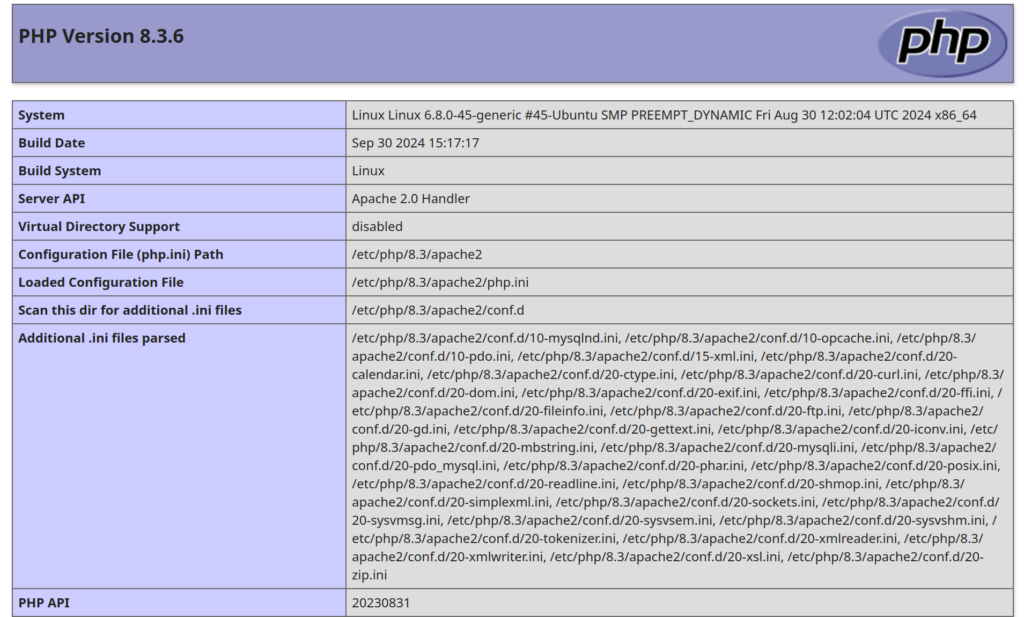
You should see a detailed page displaying PHP configuration information. If you see this, your PHP installation is successful and fully operational.
Note: Its a good idea to delete the
info.phpfile after testing to prevent exposing sensitive information about your PHP setup.
Conclusion
You have successfully installed PHP on Ubuntu! Whether you plan to build a small project or set up a full-fledged web server, PHP is now up and running on your system. Remember to keep PHP and its extensions updated to ensure your server remains secure and efficient. You can also check out our tutorial on installing and configuring a LAMP stack, to see how PHP can be used together with other powerfull web development tools. Happy coding!

